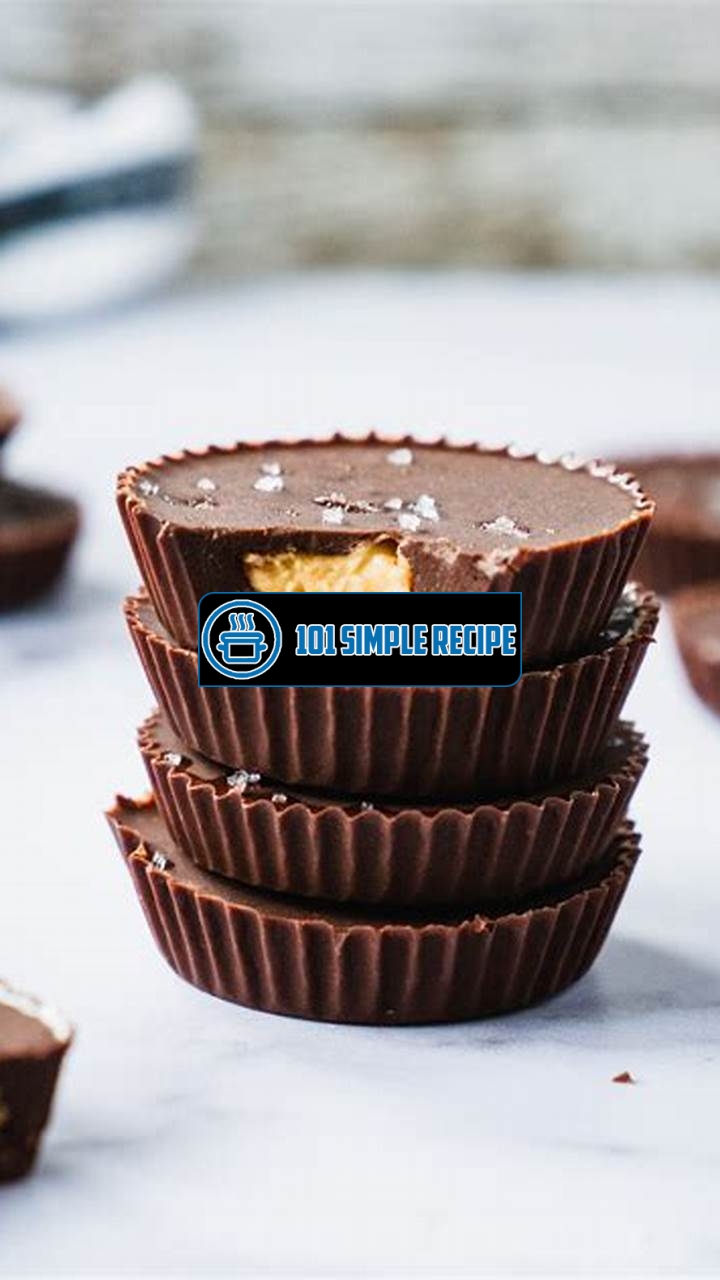
Are you ready to treat your taste buds to a delectable delight that will leave you craving for more? Indulge in the irresistible Peanut Butter Cup Delight, a mouthwatering dessert that perfectly combines the rich and creamy goodness of peanut butter with the sweetness of chocolate. This heavenly treat is a delightful blend of flavors and textures that will take you on a journey of pure bliss. From the moment you take your first bite, you’ll be captivated by the smoothness of the peanut butter filling, the velvety chocolate coating, and the satisfying crunch of the outer shell. Whether you’re a fan of peanut butter, chocolate, or simply irresistible desserts, this is one treat you just can’t resist!
The History of Peanut Butter Cups
Explore the origins and evolution of the beloved peanut butter cup confection.
The Invention of Peanut Butter Cups
The invention of the peanut butter cup can be traced back to the early 20th century. It all began with the creative mind of H.B. Reese, a former dairy farmer turned candy maker. Reese possessed a passion for experimenting with different flavors and textures, which eventually led him to create what would become one of the most beloved treats of all time: the peanut butter cup.
In the 1920s, Reese started his own candy business in Hershey, Pennsylvania. He initially focused on producing various types of candies, but it was his combination of creamy peanut butter and smooth milk chocolate that truly captured the hearts (and taste buds) of consumers.
Reese’s first peanut butter cups were handmade and individually wrapped. They quickly gained a loyal following and generated a buzz within the candy industry. Soon, word of this delectable delight spread far and wide, acquiring a reputation for its irresistible taste and unique combination of flavors.
Reese’s invention of the peanut butter cup was a game-changer, introducing a new and innovative candy that has stood the test of time. This delicious treat became an instant hit and paved the way for future confectionery creations.
The Rise in Popularity
As the years passed, Reese’s peanut butter cups grew increasingly popular. Their distinct combination of creamy peanut butter and velvety chocolate formed a harmonious union, creating a flavor profile that was unmatched by any other candy on the market.
During the Great Depression, Reese’s peanut butter cups gained even more recognition due to their affordable price and delectable taste. People were drawn to the comfort and indulgence provided by this simple yet satisfying treat.
With the advent of television advertising in the 1950s, Reese’s peanut butter cups were catapulted into the spotlight. Clever commercials featuring catchy jingles and mouth-watering visuals showcased the irresistible nature of these confections, further solidifying their place in pop culture.
Over the years, Reese’s peanut butter cups have become a staple in countless households. From Halloween trick-or-treat bags to movie theater concessions, these treats have become synonymous with indulgence and nostalgia.
Modern Variations on the Classic Peanut Butter Cup
In recent years, the classic peanut butter cup has undergone various transformations, giving rise to modern variations that cater to different tastes and dietary preferences.
One popular twist on the traditional peanut butter cup is the dark chocolate variation, which appeals to chocolate enthusiasts seeking a more sophisticated flavor. Additionally, the introduction of crunchy peanut butter cups provides an extra layer of texture and crunchiness.
For those with dietary restrictions or preferences, there are now vegan and gluten-free peanut butter cups available on the market. These alternatives allow individuals with specific dietary needs to also savor the delectable combination of peanut butter and chocolate.
Furthermore, brands have taken the classic peanut butter cup concept and expanded it into other forms, such as ice cream, cereal, and even protein bars. This evolution demonstrates the enduring popularity and versatility of the beloved peanut butter cup.
In conclusion, the history of peanut butter cups dates back to the innovative mind of H.B. Reese and has since become an iconic treat beloved by millions. From its humble beginnings to its modern-day variations, the peanut butter cup continues to captivate taste buds and satisfy sweet cravings around the world.
If you’re in the mood for something other than a peanut butter cup, check out this White Castle recipe. It’s a great option for a savory and satisfying meal.
The Science Behind Peanut Butter Cups
When you sink your teeth into a delectable peanut butter cup, you are experiencing a harmonious balance of flavors and textures. But have you ever wondered about the science behind creating these irresistible treats? Let’s delve into the chemistry and culinary techniques that go into crafting the perfect peanut butter cup.
The Role of Emulsification
Emulsification is a crucial process in peanut butter cup-making. It is the process of combining two ingredients that wouldn’t naturally mix together, like oil and water. In this case, the key role of emulsification is to combine the peanut butter and any added fats or oils.
When emulsified, the combination of peanut butter and fats creates a smooth and creamy texture. This is important for the filling of a peanut butter cup, as it ensures a consistent and pleasurable experience with every bite.
Choosing the Right Peanut Butter
Not all peanut butters are created equal, and choosing the right one is essential for the perfect peanut butter cup. Creamy or crunchy, natural or sweetened – the choices are endless. However, there are a few key factors to consider.
- Consistency: Opt for a peanut butter with a smooth and creamy consistency. This will help in achieving a cohesive filling for your peanut butter cup.
- Sweetness: The amount of added sugar in the peanut butter can affect the overall sweetness of the final product. Adjust accordingly based on your taste preferences.
- Quality: Choose a high-quality peanut butter that is made with 100% peanuts or natural ingredients. This ensures a rich and authentic peanut flavor in your cup.
By carefully considering these factors, you can ensure that your peanut butter cup is a cut above the rest.
Tempering Chocolate for the Shell
The final touch to a peanut butter cup is its chocolate shell. To achieve that desirable snap when you bite into it, tempering the chocolate is crucial. Tempering is the process of heating and cooling chocolate to specific temperatures to stabilize the cocoa butter crystals.
To temper chocolate, start by melting it slowly over low heat. Then, cool it down by adding small amounts of unmelted chocolate while stirring continuously. This process helps the chocolate to crystallize smoothly, resulting in a shiny and snappy shell for your peanut butter cup.
By following these tips and techniques, you can elevate your peanut butter cup game and create a truly delightful treat that will leave your taste buds craving for more.
For a delicious twist on the classic peanut butter cup, try out this peanut butter cup recipe. It’s the perfect combination of rich chocolate and creamy peanut butter that will satisfy your sweet tooth.
Making Peanut Butter Cups at Home
Are you craving the delectable combination of rich chocolate and creamy peanut butter? Instead of heading to the store to satiate your sweet tooth, why not try making peanut butter cups in the comfort of your own kitchen? With just a few simple steps and some handy tips, you can recreate this irresistible treat at home. Let’s dive in and discover how to make the perfect peanut butter cups from scratch.
Gathering the Ingredients and Equipment
Before you embark on your peanut butter cup journey, it’s important to gather all the necessary ingredients and equipment. Here’s what you’ll need:
- Chocolate (milk, dark, or a combination)
- Peanut butter (smooth or crunchy)
- Confectioners’ sugar
- Butter
- Salt
- Vanilla extract
- Cupcake liners or silicone molds
- Mixing bowls and spoons
- Double boiler or microwave-safe bowl
- Measuring cups and spoons
- a Sheet pan or baking tray
Make sure to double-check your kitchen pantry to ensure you have all the necessary ingredients on hand. There’s nothing worse than getting halfway through a recipe and realizing you’re missing a crucial element!
The Art of Melting and Tempering Chocolate
One of the keys to achieving that perfect, glossy chocolate coating on your peanut butter cups is to master the art of melting and tempering chocolate. Here’s how to do it:
- Start by chopping your chocolate into small, uniform pieces. This will help it melt more evenly.
- Using a double boiler or a microwave-safe bowl, melt two-thirds of your chocolate until smooth and creamy. If using a microwave, be sure to heat the chocolate in short bursts, stirring in between each interval.
- Remove the melted chocolate from the heat source and gradually add the remaining one-third of the chocolate, stirring continuously. This will help lower the temperature and temper the chocolate, giving it that shiny finish.
- Continue stirring until all the chocolate is melted and the temperature reaches around 88°F (31°C).
Note: Tempering chocolate can be a bit tricky, so practice is key. If you’re unsure about tempering, you can skip this step and simply melt the chocolate until smooth. It may not have the same glossy appearance, but it will still taste delicious!
Filling and Assembling the Cups
Now that you have your melted chocolate ready, it’s time to move on to filling and assembling the peanut butter cups. Here’s how:
- Line your cupcake liners or silicone molds on a sheet pan or baking tray for easy transfer.
- In a mixing bowl, combine the peanut butter, confectioners’ sugar, melted butter, salt, and vanilla extract. Mix well until all the ingredients are fully incorporated.
- Using a spoon or a piping bag, fill each cupcake liner or silicone mold with a layer of melted chocolate.
- Next, spoon a small dollop of the peanut butter filling onto the center of each chocolate layer. Gently press it down with the back of the spoon, ensuring there are no gaps.
- Finally, cover the peanut butter filling with another layer of melted chocolate, making sure to completely seal the cups.
- Place the tray in the refrigerator and let the peanut butter cups set for at least an hour, or until the chocolate hardens.
Once the cups have fully set, remove them from the refrigerator and enjoy the sweet reward of your homemade peanut butter cups! Store any leftovers in an airtight container in the fridge to maintain freshness.
With these step-by-step instructions and helpful tips, you’ll be able to indulge in the irresistible delight of homemade peanut butter cups whenever the cravings strike. So why wait? Put on your apron, gather your ingredients, and let the peanut butter cup creation begin!
Adding a Personal Twist to Peanut Butter Cups
When it comes to peanut butter cups, there’s no denying their universal appeal. The classic combination of smooth peanut butter and rich chocolate is undeniably delicious. However, if you want to take your homemade peanut butter cups to the next level, it’s time to get creative and add your own personal twist. By experimenting with different variations and flavor combinations, you can elevate this beloved treat and make it truly your own.
One way to add a personal touch to your peanut butter cups is by using alternative nut butters. While traditional peanut butter is always a crowd-pleaser, consider trying almond butter, cashew butter, or even hazelnut butter for a unique twist. Each nut butter brings its own distinct flavor profile, making your peanut butter cups stand out from the rest.
Another way to elevate your peanut butter cups is by incorporating different types of chocolate. While milk chocolate is the classic choice, why not experiment with dark chocolate, white chocolate, or even flavored chocolates like mint or raspberry? This simple switch can completely transform the taste of your peanut butter cups, adding depth and complexity to each bite.
If you’re a fan of texture, consider adding crunchy add-ins to your peanut butter cups. Chopped nuts, crispy rice cereal, or even crushed pretzels are all excellent choices. Not only do they provide a satisfying crunch, but they also add visual appeal to your treats. The combination of smooth peanut butter, creamy chocolate, and crunchy add-ins creates a delightful textural experience for your taste buds.
Infusing Flavors into the Peanut Butter Filling
While peanut butter itself is delicious, why not take it up a notch by infusing additional flavors into the filling of your peanut butter cups? This is where you can truly let your creativity shine. Here are some ideas to get you started:
Add a hint of cinnamon or nutmeg for a warm and cozy flavor.
Incorporate a touch of sea salt for a sweet and salty combination that’s irresistible.
Drizzle honey into the peanut butter mixture to add a natural sweetness.
Mix in crushed cookies or graham crackers to create a nostalgic cookies-and-cream variation.
For a burst of fruity goodness, try mixing in some finely chopped dried fruit like cherries or cranberries.
By infusing these flavors into the peanut butter filling, you can customize your peanut butter cups to suit your taste preferences and make them truly one-of-a-kind.
Remember, the key to creating your own signature peanut butter cups is to have fun and let your imagination run wild. Don’t be afraid to experiment and push the boundaries of traditional flavors. Whether you’re making them for yourself or to share with others, your personalized peanut butter cups are sure to be a hit!
Sharing and Storing Your Peanut Butter Cups
When it comes to homemade peanut butter cups, the joy of indulging in their irresistible taste is amplified when you can share them with your loved ones. However, it is essential to know the best ways to preserve and present these delectable treats to ensure maximum freshness and enjoyment. In this article, we will explore various packaging and gift ideas, tips for proper storage, and the art of freezing and thawing peanut butter cups.
Packaging and Gift Ideas
One of the best ways to share your homemade peanut butter cups is by packaging them in an appealing and thoughtful manner. Here are some creative packaging and gift ideas to consider:
- Decorative Boxes: Place your peanut butter cups in elegant boxes that are specially designed for confectionary items. These boxes come in various sizes and designs, adding a touch of sophistication to your gift.
- Cellophane Bags: For a more casual and fun presentation, you can use clear cellophane bags. Fill them with your peanut butter cups and tie them with colorful ribbons for a festive touch.
- Mason Jars: Get creative by layering your homemade peanut butter cups in mason jars. This visually appealing presentation allows the recipient to see all the layers of deliciousness.
Note: Adding a personal touch to your packaging, such as hand-written notes or customized labels, can make your gift even more special.
Tips for Proper Storage
To ensure the freshness and longevity of your peanut butter cups, proper storage is crucial. Here are some essential tips to keep in mind:
- Airtight Containers: Store your peanut butter cups in airtight containers to prevent them from absorbing any odors or moisture from the surroundings. This will help maintain their original flavor and texture.
- Room Temperature: Peanut butter cups can be stored at room temperature, as long as the room is cool and dry. Avoid exposing them to direct sunlight or any heat sources, as this can cause them to melt or lose their shape.
- Refrigeration: If you live in a hot and humid climate, refrigeration can be a viable option. However, make sure to place your peanut butter cups in a sealed container to protect them from absorbing any unwanted odors from the fridge.
Freezing and Thawing Peanut Butter Cups
Whether you want to save your peanut butter cups for future cravings or prepare them in advance for a special occasion, freezing can be a convenient option. Here’s how you can freeze and thaw peanut butter cups:
- Freezing: Place your peanut butter cups in a single layer on a baking sheet lined with parchment paper. Freeze them for about an hour or until firm. Once frozen, transfer them to an airtight container or freezer bags.
- Thawing: When you’re ready to enjoy your frozen peanut butter cups, transfer them to the refrigerator and let them thaw for a few hours. Avoid thawing them at room temperature, as it can cause condensation and affect their texture.
By following these tips and ideas, you can ensure that your homemade peanut butter cups are always presented and stored in the best possible way. Whether you’re sharing them as a gift or savoring them yourself, the irresistible delight of these treats will never cease to amaze.
Looking for a recipe that can help you lose weight? This weight loss recipe is packed with healthy ingredients that will keep you feeling full and satisfied.
Thank you for taking the time to read our article on the delicious peanut butter cup recipe! We hope you found it informative and inspiring. Whether you decide to try making these sweet treats for yourself or share them with loved ones, we guarantee that you won’t be disappointed. Feel free to visit our website again later for more mouth-watering recipes, helpful tips, and exciting food-related content. Happy cooking!
Frequently Asked Questions
Here are some frequently asked questions about our peanut butter cup recipe:
| No. | Questions | Answers |
|---|---|---|
| 1 | Can I use a different type of nut butter instead of peanut butter? | Absolutely! You can experiment with different nut butters like almond butter or cashew butter to create unique flavor combinations. |
| 2 | Can I use dark chocolate instead of milk chocolate for the coating? | Definitely! Dark chocolate can add a rich and slightly bitter taste to the peanut butter cups. Feel free to use your preferred type of chocolate. |
| 3 | How long can I store the peanut butter cups? | If stored in an airtight container in the refrigerator, the peanut butter cups can last for up to two weeks. However, they are so delicious that they usually get eaten much faster! |
| 4 | Can I add additional toppings to the peanut butter cups? | Absolutely! You can sprinkle crushed nuts, sea salt, or even colorful sprinkles on top of the melted chocolate before it sets to add some extra texture and flavor. |
| 5 | Can I make the peanut butter cups in advance and freeze them? | Yes, you can! Simply place the peanut butter cups in an airtight container or freezer bag and freeze for up to 3 months. Thaw them in the refrigerator before serving. |
| 6 | Are peanut butter cups gluten-free? | It depends on the ingredients you use. If you choose gluten-free chocolate and peanut butter without any added ingredients containing gluten, then the peanut butter cups can be gluten-free. Always check the labels to be sure. |
Closing Thoughts
Thank you once again for reading our article on the mouth-watering peanut butter cup recipe. We hope you enjoy creating these delectable treats in your own kitchen. Remember to visit our website regularly for more delicious recipes that will satisfy your sweet tooth. Happy cooking and indulging!
Jump to Recipe
Peanut Butter Cup Recipe

Indulge in the heavenly combination of creamy peanut butter and smooth milk chocolate with this easy homemade peanut butter cup recipe. Perfect for satisfying your sweet tooth or impressing guests at a party.
- 1 cup milk chocolate chips
- 1/2 cup creamy peanut butter
- 1/4 cup powdered sugar
- 1/4 teaspoon vanilla extract
- 1/8 teaspoon salt
- 1/4 cup crushed peanuts (optional, for topping)
- Line a muffin tin with paper or silicone cupcake liners.
- In a microwave-safe bowl, melt the milk chocolate chips in 30-second intervals, stirring in between, until smooth.
- Place a spoonful of melted chocolate into each cupcake liner, spreading it around the bottom and slightly up the sides.
- In a separate bowl, mix together the peanut butter, powdered sugar, vanilla extract, and salt until well combined.
- Take spoonfuls of the peanut butter mixture and gently press them down into the center of each chocolate-filled cupcake liner.
- Cover the peanut butter with another spoonful of melted chocolate, making sure to completely cover the filling.
- If desired, sprinkle crushed peanuts on top of the melted chocolate before it sets.
- Place the muffin tin in the refrigerator for at least 1 hour, or until the chocolate is fully set.
- Once set, remove the peanut butter cups from the cupcake liners and serve.
- Enjoy!

