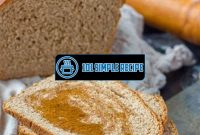
Are you looking for a simple and delicious bread recipe? Look no further! This easy no knead artisan bread recipe is perfect for both seasoned bakers and beginners alike. With just a few ingredients and minimal effort, you can enjoy freshly baked bread right from your own kitchen. So put on your apron and let’s get started on this delightful baking adventure!

The Basics of No Knead Artisan Bread
Discover the simplicity and deliciousness of making no knead artisan bread at home.
What is No Knead Artisan Bread?
No knead artisan bread is a popular type of bread that can be easily made at home without the need for extensive kneading. This method of bread-making gained popularity after a recipe was featured in The New York Times by Jim Lahey, the owner of Sullivan Street Bakery. The key characteristic of this bread is its long fermentation period, which allows for an extended rise and development of flavor.
With traditional bread-making techniques, kneading is essential to develop gluten, a protein that gives bread its structure. However, with no knead artisan bread, gluten development is achieved through a longer fermentation process.
- ✨ Simple preparation: No knead artisan bread requires minimal ingredients and equipment, making it an accessible option for beginner bakers.
- ✨ Extended fermentation: The dough is left to rise for a longer period, typically overnight, which enhances the flavor and texture of the final product.
- ✨ Crispy crust and airy interior: The long fermentation and high moisture content create a crust that is golden and crunchy, while the interior is soft and open.
This bread is often characterized by its rustic appearance, with a crackly crust and irregular holes in the crumb. It pairs well with a variety of toppings and can be enjoyed on its own or as accompaniment to soups, salads, and other dishes.
The Science Behind No Knead Artisan Bread
The science behind no knead artisan bread lies in the process of fermentation. Fermentation is a natural process in which yeast breaks down sugars in the dough, producing carbon dioxide gas. This gas gets trapped in the gluten network, causing the dough to rise and create air pockets.
During the long fermentation period of no knead artisan bread, enzymes in the dough break down complex starches into simpler sugars, enhancing the flavor of the bread. The extended rise also allows for more time for gluten to develop, resulting in a chewy texture.
The Benefits of No Knead Artisan Bread
No knead artisan bread offers several benefits that make it an attractive option for home bakers:
- Convenience: The minimal hands-on time required for this bread allows for greater flexibility in your baking schedule.
- Healthiness: No knead artisan bread typically contains fewer preservatives and additives compared to store-bought bread.
- Cost-effective: Making your own bread can save money in the long run, as the ingredients are generally inexpensive and readily available.
- Creativity: No knead artisan bread can be customized with various add-ins like herbs, cheese, or nuts, allowing you to experiment with different flavor profiles.
Whether you are a seasoned baker or just starting out, exploring the world of no knead artisan bread can be a rewarding and delicious endeavor. With its minimal steps and incredible flavor, this bread is sure to become a staple in your kitchen.
No knead artisan bread recipe is a popular recipe that requires minimal effort and produces delicious homemade bread. This recipe is perfect for beginners or anyone looking for a quick and easy bread recipe.
Getting Started: Tools and Ingredients
Equip yourself with the necessary tools and ingredients to make perfect no knead artisan bread.
Essential Tools for Making No Knead Artisan Bread
When it comes to making delicious no knead artisan bread, having the right tools is key. Here are the essential tools you’ll need:
- Dutch Oven: This heavy, lidded pot is crucial for achieving that perfect crust and soft interior. Make sure to choose a Dutch oven that can withstand high temperatures.
- Mixing Bowl: A large mixing bowl will be used to combine all the ingredients and facilitate the fermentation process.
- Bench Scraper: This handy tool will help you handle and shape the dough without sticking to your hands or work surface.
- Baking Stone or Steel: Placing your Dutch oven on a preheated baking stone or steel will help distribute the heat evenly and ensure a crispy crust.
- Parchment Paper: Using parchment paper will prevent the dough from sticking to the Dutch oven and make it easier to transfer the bread.
Note: These tools are essential for achieving the best results, but you can still make delicious bread with alternative options if needed.
Key Ingredients for No Knead Artisan Bread
To create the perfect no knead artisan bread, you’ll need these key ingredients:
- Bread Flour: This high-protein flour is essential for developing the gluten structure in the bread.
- Yeast: Active dry yeast or instant yeast will give your bread the necessary rise and fluffy texture.
- Salt: Salt enhances the flavor of the bread and helps to control the fermentation process.
- Water: Water is needed to hydrate the dough and activate the yeast.
Note: It’s important to use high-quality ingredients for the best results. Fresh yeast and filtered water are recommended for optimal flavor.
Optional Additions for Flavorful Variations
If you want to add a twist to your no knead artisan bread, consider experimenting with these flavorful additions:
- Herbs and Spices: Add dried herbs like rosemary or thyme, or spices like garlic powder or paprika to infuse your bread with aromatic flavors.
- Cheese: Grate some Parmesan or sprinkle crumbled feta over the dough for a cheesy delight.
- Nuts and Seeds: Incorporate toasted nuts or seeds like walnuts, sunflower seeds, or flaxseeds for extra crunch and nutritional value.
- Dried Fruits: For a touch of sweetness, try adding dried fruits such as cranberries, raisins, or chopped dates.
Note: These additions are optional and can be customized to suit your taste preferences. Be sure to adjust the quantities accordingly.
White Castle burger recipe is a great copycat recipe that allows you to recreate the famous sliders at home. This recipe is perfect for burger lovers and provides all the details needed to make these tasty sliders.
The No Knead Process: Mixing, Fermenting, and Baking
Learn the step-by-step process of making no knead artisan bread from start to finish.
Mixing the Dough: Simplifying the Recipe
In order to simplify the process of making a no knead artisan bread, the dough mixing stage is crucial. It is important to gather all the necessary ingredients. Grab a large mixing bowl and combine the flour, yeast, salt, and water. With a wooden spoon or spatula, stir the ingredients together until a shaggy and sticky dough forms. The shagginess and stickiness of the dough are key indicators that it is well-mixed and ready for fermentation.
Note: It’s important to not overmix the dough, as this can result in a dense and tough texture.
Once the dough is mixed, cover the bowl with plastic wrap or a clean kitchen towel. Let the dough rest at room temperature for approximately 12 to 18 hours. During this time, the fermentation process will take place, creating a complex flavor profile.
- Create a shaggy and sticky dough.
- Do not overmix the dough.
- Let the dough rest for 12 to 18 hours.
Fermenting the Dough for Optimal Flavor
Fermenting the dough is a crucial step in the process of making a no knead artisan bread. During the fermentation process, the yeast present in the dough consumes the sugars and produces carbon dioxide gas, causing the dough to rise and develop a richer flavor.
Note: The longer the fermentation period, the more complex and flavorful the bread will be.
After the initial resting period, gently uncover the dough and fold it onto itself a few times. This helps redistribute the yeast and encourages further fermentation. Cover the dough once again and allow it to rest for an additional 2 to 3 hours.
Note: The dough should double in size during this second resting period, indicating that fermentation is occurring successfully.
- Allow the dough to ferment for optimal flavor development.
- Fold the dough onto itself to redistribute the yeast.
- Let the dough rest for an additional 2 to 3 hours.
Baking the Bread: Perfecting the Crust and Texture
Once the dough has gone through the fermentation process, it is time to bake it to perfection. Preheat the oven to a high temperature, around 450°F (230°C). Place a Dutch oven or a covered pot in the oven while it preheats.
Note: Preheating the pot ensures that the bread will cook evenly and develop a crispy crust.
Once the oven has reached the desired temperature, carefully remove the hot pot from the oven. Place the dough into the pot, seam side up. Cover the pot with the lid and return it to the oven.
Bake the bread covered for approximately 30 minutes. Then, remove the lid and continue baking for an additional 15 to 20 minutes, or until the bread is golden brown and sounds hollow when tapped on the bottom.
- Preheat the oven to 450°F (230°C) with a covered pot inside.
- Place the dough into the preheated pot and cover it with the lid.
- Bake the bread covered for 30 minutes, then remove the lid and bake for an additional 15 to 20 minutes until golden brown.
Note: The covered pot creates a steamy environment, resulting in a crispy crust and an airy interior.
By following this step-by-step process of mixing, fermenting, and baking, you can easily create a delicious and homemade no knead artisan bread. Enjoy the satisfaction and aroma that comes from baking your own bread, and impress your friends and family with your newfound baking skills!
Aunt Annie’s pretzel recipe is a great option if you’re looking to try something different with your homemade pretzels. The recipe uses simple ingredients and provides step-by-step instructions for making delicious pretzels at home.
Troubleshooting: Common Issues and Solutions
When it comes to making no knead artisan bread, there are several common challenges that can arise. However, with the right solutions, you can overcome these obstacles and achieve the perfect loaf of bread every time. Let’s explore some of the most common issues and their helpful solutions.
Dense and Heavy Loaf
One of the most frustrating problems that can occur when making no knead artisan bread is ending up with a dense and heavy loaf. This can happen for a few different reasons. Firstly, it’s important to ensure that you’re using the correct type and ratio of ingredients. Make sure to measure your flour accurately and use the proper amount of yeast or starter. Additionally, the dough may have been overproofed, resulting in a dense texture. To fix this, try reducing the proofing time or temperature and see if that makes a difference. Finally, make sure you’re giving the dough ample time to rise before baking. A longer rise time can contribute to a lighter and more airy loaf.
Flat and Spread-out Loaf
Another issue that can occur when making no knead artisan bread is ending up with a loaf that is flat and spread-out. This can be disappointing, especially if you were aiming for a beautiful, round loaf. One common reason for a flat loaf is insufficient gluten development. Gluten is what gives bread its structure and helps it rise. To improve gluten development, try mixing the dough for a longer period or incorporating some stretching and folding techniques. Another possible cause of a flat loaf is overhydration. If the dough is too wet, it may not hold its shape during baking. In this case, try reducing the amount of water or adjusting the hydration level of your recipe.
Overly Hard or Thick Crust
An overly hard or thick crust can be another issue that you may encounter when making no knead artisan bread. While a crusty exterior is desirable, it should also be tender and easy to bite into. To achieve the perfect crust, make sure you’re using the right baking temperature and time. A higher oven temperature can result in a thicker and harder crust. Additionally, keep in mind that the type of flour you use can also affect the crust. Bread flour or a mix of bread flour and all-purpose flour tend to create a more chewy and crusty exterior. If you prefer a softer crust, you can experiment with using more all-purpose flour in your recipe. Lastly, consider using steam during the baking process to help create a crisp crust. This can be achieved by placing a pan of hot water in the oven or spraying water onto the sides of the oven.
By addressing these common challenges and implementing the suggested solutions, you’ll be well on your way to baking the perfect no knead artisan bread. Remember, practice makes perfect, so don’t be discouraged if your first few loaves don’t turn out exactly as planned. With time and experience, you’ll become a master bread baker!
Artisan Bread Variations: Exploring Flavors and Textures
When it comes to baking bread, the possibilities are endless. With a simple and easy no knead artisan bread recipe, you can explore a wide range of flavors and textures to satisfy different tastes and preferences. Whether you’re a seasoned baker or just starting out, these variations will take your bread to the next level of deliciousness.
Adding Herbs and Spices for Enhanced Flavor
One way to elevate the flavor of your artisan bread is by adding herbs and spices. The right combination can create a harmonious blend of flavors that will leave your taste buds dancing with joy. Try adding rosemary and thyme for a Mediterranean twist, or experiment with cumin and paprika for a hint of warmth and depth. Don’t be afraid to get creative and mix and match different herbs and spices to create your own unique flavor profile.
Experimenting with Different Flours
Another way to explore the world of artisan bread is by experimenting with different flours. While the classic recipe calls for all-purpose flour, you can try using whole wheat flour for a nuttier taste or rye flour for a more robust flavor. Each type of flour brings its own distinct characteristics to the bread, so don’t be afraid to get adventurous and see which one suits your taste buds the best.
Incorporating Nuts, Seeds, and Dried Fruits
If you want to add some texture and sweetness to your artisan bread, consider incorporating nuts, seeds, and dried fruits into the dough. Walnuts and cranberries can add a delightful crunch and tang, while flaxseeds and sunflower seeds can provide a nutty flavor and added nutritional value. The possibilities are endless, so feel free to mix and match your favorite ingredients to create a bread that is truly unique.
With these variations, you can transform your no knead artisan bread into a culinary masterpiece. The key is to have fun and experiment with different flavors and ingredients. Don’t be afraid to take risks and push the boundaries of what you think bread should be. Who knows, you might just discover a new favorite flavor combination or create a bread that becomes the talk of the town. So grab your apron, preheat that oven, and let your creativity soar!
Thank you for reading this article on the no knead artisan bread recipe. We hope you found it informative and helpful in your bread-making journey. If you enjoyed this recipe and would like to explore more delicious recipes like this, please visit our website again later for more mouthwatering content. Happy baking!
Frequently Asked Questions
Here are some frequently asked questions about the no knead artisan bread recipe:
| No. | Questions | Answers |
|---|---|---|
| 1. | How long does the dough need to rise? | The dough needs to rise for at least 12-18 hours to develop the best flavor and texture. Be patient, it’s worth the wait! |
| 2. | Can I use whole wheat flour instead of all-purpose flour? | Yes, you can substitute whole wheat flour for all or part of the all-purpose flour. Keep in mind that the texture and flavor may differ slightly. |
| 3. | Can I add herbs or other ingredients to the dough? | Absolutely! Feel free to customize your bread by adding herbs, cheese, olives, or any other ingredients you like. Get creative! |
| 4. | Can I bake the bread in a Dutch oven? | Yes, using a Dutch oven is a great way to achieve a crispy crust and soft, moist interior. Make sure to preheat the Dutch oven before adding the dough. |
| 5. | How should I store the bread? | Once the bread is completely cooled, store it in a paper bag or bread box to maintain its texture. Avoid storing it in a plastic bag, as it may become soggy. |
| 6. | Can I freeze the dough? | Yes, you can freeze the dough after the first rise. Simply wrap it tightly in plastic wrap and place it in the freezer. Thaw it in the refrigerator overnight before baking. |
Closing Remarks
We hope you enjoy making this no knead artisan bread and that it becomes a staple in your kitchen. Remember to savor the aroma and taste of freshly baked bread. Don’t forget to visit us again later for more delightful recipes!
Jump to Recipe
No Knead Artisan Bread

Learn how to make a delicious and crusty no knead artisan bread with this easy recipe. Perfect for beginners and seasoned bakers alike.
- 3 cups all-purpose flour
- 1 1/2 teaspoons salt
- 1/4 teaspoon dry yeast
- 1 1/2 cups lukewarm water
- In a large mixing bowl, combine the flour, salt, and yeast. Mix well.
- Add the water to the flour mixture and stir until a shaggy dough forms.
- Cover the bowl with plastic wrap and let it rise at room temperature for 12-18 hours.
- Preheat your oven to 450°F (230°C). Place a Dutch oven or a cast iron pot with a lid in the oven to preheat as well.
- Carefully remove the hot pot from the oven and transfer the dough into it. Be cautious not to burn yourself.
- Cover the pot with the lid and bake for 30 minutes. Remove the lid and bake for an additional 15 minutes or until the bread is golden brown.
- Remove the bread from the pot and let it cool on a wire rack before slicing and serving.


