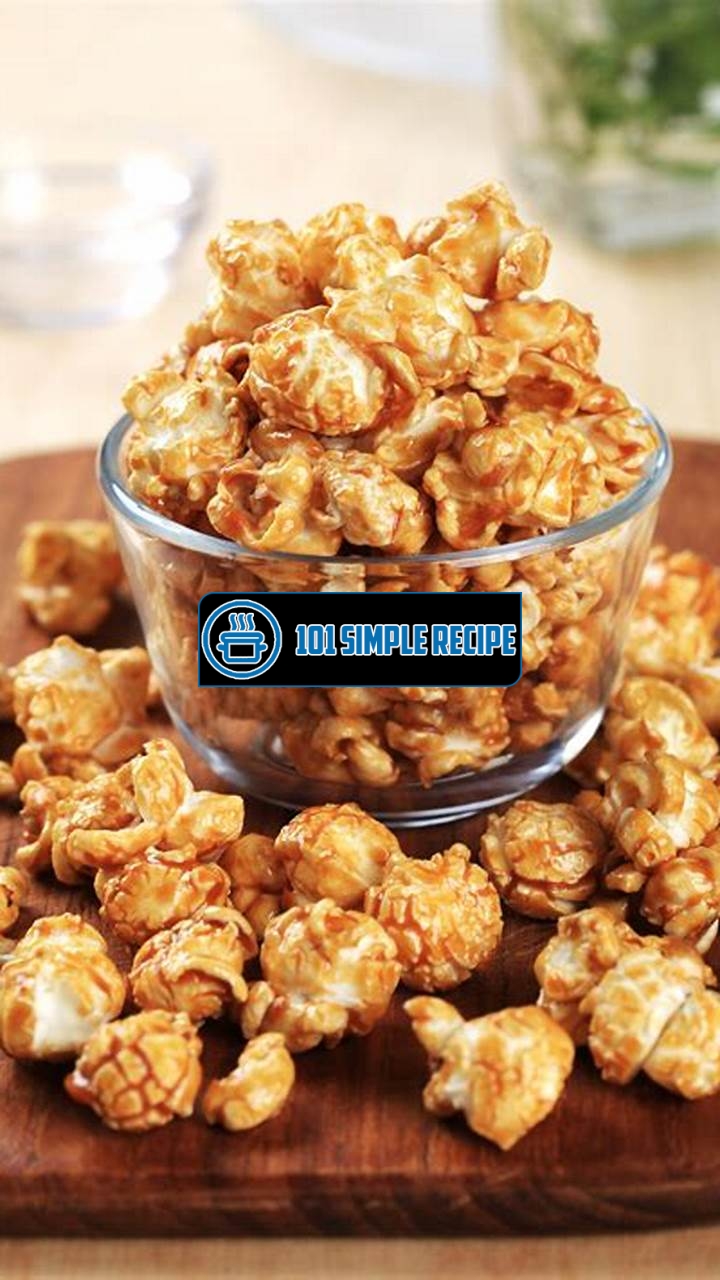
Are you craving a delicious sweet treat that will satisfy your taste buds? Look no further! We have the perfect caramel corn recipe that will surely make you drool. Whether you’re planning a movie night with friends or simply want to indulge in a delightful snack, this recipe is a must-try. Imagine biting into crunchy popcorn, coated in a golden caramel glaze that’s perfectly sweet and buttery. The combination of flavors and textures will leave you wanting more. So grab your apron and get ready to whip up this mouthwatering caramel corn treat!

Choosing the Perfect Varieties
When it comes to making delicious caramel corn, choosing the right varieties of corn kernels is crucial. The type of corn kernels you use will greatly impact the final taste and texture of your caramel corn. In this section, we will explore different types of corn kernels that are ideal for making this sweet treat.
Selecting the Best Popcorn Kernels
If you want to achieve the perfect popcorn for your caramel corn recipe, it’s important to choose the best popcorn kernels. Look for kernels that are specifically labeled as popcorn kernels, as they are specially grown and processed for popping. These kernels have a higher moisture content and a tough outer hull that allows them to burst open and create those fluffy popcorn pieces we all love.
When selecting popcorn kernels, consider the following factors:
- Moisture content: Look for kernels that have a moisture content of around 13-14%. This will ensure that the kernels pop evenly and don’t become too dry or chewy.
- Size: Opt for kernels that are uniform in size. This will help ensure that they pop evenly and result in a consistent texture.
- Popability: Some popcorn kernels have a higher “popability” rate than others, meaning they have a higher chance of popping into fluffy pieces. Look for varieties that are known for their high popability.
By selecting the best popcorn kernels, you’ll be setting yourself up for success in creating the perfect caramel corn.
Exploring Specialty Corn Varieties
If you’re looking to add a unique twist to your caramel corn recipe, consider using specialty corn varieties. These varieties offer distinct flavors and textures that can take your caramel corn to the next level.
One popular specialty corn variety is the heirloom corn. Heirloom corns come in various colors, such as red, blue, and purple, and they often have a sweeter taste compared to traditional yellow or white popcorn. Adding heirloom corn to your caramel corn recipe can result in a visually appealing treat with a delightful flavor.
Another specialty corn variety to consider is the mushroom popcorn. Mushroom popcorn has a round, ball-like shape and a denser texture. When coated with caramel, mushroom popcorn creates a crunchy and satisfying snack.
Don’t forget about baby corn! Baby corn is harvested at an early stage, resulting in small, tender corn cobs. While baby corn may not be suitable for popping like traditional popcorn, it can be a fun and unexpected addition to your caramel corn recipe.
By exploring different specialty corn varieties, you can add a touch of creativity and uniqueness to your caramel corn.
Mixing and Matching for Unique Flavors
Finally, when it comes to creating unique flavors in your caramel corn, don’t be afraid to mix and match different corn varieties. Combining different popcorn kernels can lead to interesting flavor combinations that will surprise and delight your taste buds.
Consider mixing white and yellow popcorn kernels for a classic caramel corn flavor with a twist. The combination of the two varieties adds both sweetness and richness to the final product.
If you’re feeling adventurous, try mixing specialty corn varieties with traditional popcorn kernels. This will create a caramel corn with multiple layers of flavor and texture, elevating your sweet treat to new heights.
Remember, the type of corn kernels you choose will greatly influence the overall taste and texture of your caramel corn. So, take the time to explore different varieties, select the best popcorn kernels, and don’t be afraid to mix and match for unique flavors. Happy caramel corn making!
Preparing the Caramel Coating
Are you a sweet treat lover in search of a mouthwatering caramel corn recipe? Look no further! In this article, we will guide you through the process of creating a rich and sweet caramel coating that will take your popcorn to the next level of deliciousness. Get ready to indulge in a delightful homemade snack that will satisfy your cravings.
Melting Sugar for a Perfect Texture
The first step in preparing the caramel coating is melting the sugar. This process is essential to achieve the perfect texture that will evenly coat your popcorn. In a saucepan over medium heat, pour the granulated sugar and let it melt. As the sugar starts to heat up, it will gradually turn into a golden liquid, creating a smooth caramel base for your popcorn.
- Important Point: Ensure that you stir the sugar constantly to prevent it from burning.
- Important Point: Be patient during this step as it may take some time for the sugar to fully melt.
Adding Butter for Flavor Enhancement
Once the sugar has melted into a caramel consistency, it’s time to add butter to enhance the flavor. The butter will bring a rich and creamy taste to your caramel coating, making each bite even more irresistible. Cut the butter into small pieces and gradually add them to the melted sugar. Stir continuously until the butter has completely melted and blended with the caramel.
- Important Point: Use unsalted butter to have better control over the overall flavor of your caramel corn.
- Important Point: Keep stirring the mixture to ensure that the butter is evenly distributed.
- Important Point: The combination of sugar and butter will create a heavenly aroma that will fill your kitchen and tempt your taste buds.
Secret Ingredients for Extra Tastiness
To take your caramel corn to the next level, we have a few secret ingredients that will add extra tastiness to your recipe. These ingredients will elevate the flavor profile and make your homemade caramel corn truly outstanding.
- First Secret Ingredient: Vanilla extract. A splash of vanilla extract will bring a subtle but delightful hint of flavor to your caramel corn. It will complement the sweetness and leave you craving for more.
- Second Secret Ingredient: Sea salt. Just a pinch of sea salt sprinkled over the caramel coating will provide a perfect balance to the sweetness. The combination of sweet and salty creates a harmonious taste sensation that is hard to resist.
- Third Secret Ingredient: Baking soda. Adding a small amount of baking soda will create a light and airy texture in your caramel coating. It will make your popcorn irresistibly crispy and give it a delightful crunch.
Note: Feel free to experiment with additional secret ingredients like cinnamon, nutmeg, or even a drizzle of melted chocolate for a personalized twist to your caramel corn recipe.
Now that you have learned the step-by-step process of preparing the rich and sweet caramel coating, it’s time to bring your popcorn dreams to life. With this delectable caramel corn recipe, you are ready to impress your friends and family with a homemade snack that will have them coming back for more. So, put on your chef’s hat, grab your ingredients, and let’s get popping!
Popping Techniques for Optimum Results
When it comes to making caramel corn, achieving perfectly popped corn is crucial for the caramelization process. To ensure you get the desired results, mastering different popping methods can make all the difference. In this article, we will explore three popular techniques: air popping, using a popcorn machine, and traditional stovetop popping. Each method has its own unique advantages and can contribute to the overall texture and taste of your caramel corn.
Air Popping for a Healthier Option
If you are looking for a healthier alternative, air popping is the way to go. This method uses hot air to pop the corn kernels, eliminating the need for any additional oil or butter. The result? Light and fluffy popcorn with fewer calories and less fat! ✨
To air pop your corn, you’ll need an air popper, which can easily be found in most kitchen appliance stores. Simply pour the corn kernels into the machine, turn it on, and watch as the hot air magically transforms them into perfectly popped popcorn. Once you have your air-popped popcorn ready, you can proceed to the caramelization stage and enjoy guilt-free indulgence!
Using a Popcorn Machine for Consistency
If you want consistent results every time, using a popcorn machine is a reliable option. Popcorn machines are specifically designed to pop corn kernels evenly and consistently throughout the entire process. This means you’ll have a higher chance of achieving an even coating of caramel on each piece of popcorn.
To use a popcorn machine, start by adding the corn kernels and any desired oil or seasoning into the machine. Close the lid and turn it on. Soon, you’ll hear the delightful sound of popcorn popping, and in just a matter of minutes, you’ll have a large batch of perfectly popped corn. With the consistent results from a popcorn machine, your caramel corn will have that professional touch while still being made in the comfort of your own kitchen.
Traditional Stovetop Popping for Classic Crunchiness
For those who appreciate the classic crunchiness of caramel corn, the traditional stovetop popping method is the way to go. This tried and true technique allows for optimal control over the popping process, resulting in popcorn with just the right amount of crunch.
To pop your corn using the stovetop method, all you need is a large pot with a lid, some oil, and your corn kernels. Heat the oil in the pot over medium heat, then add the corn kernels and cover the pot with the lid. As the heat intensifies, the popcorn will begin to pop, filling your kitchen with that beloved aroma. Shake the pot occasionally to ensure even heat distribution and prevent burning. Soon enough, you’ll have a batch of deliciously crunchy popcorn ready to be coated with caramel.
Whether you choose the healthier option of air popping, the consistency of a popcorn machine, or the classic crunchiness of stovetop popping, mastering the different popping techniques will set the foundation for a delectable batch of caramel corn. So go ahead, experiment with these methods, and enjoy the sweet and savory delight of homemade caramel corn!
Coating Corn for Even Distribution
If you want to make the perfect caramel corn, it’s important to ensure that every kernel is coated with delicious caramel. This can be achieved through a few simple techniques that guarantee an even distribution of the sweet coating.
One effective technique is to start by popping the corn using an air popper or stovetop method. This ensures that each kernel is fully popped and ready to be coated. After popping the corn, it’s important to let it cool down for a few minutes to ensure that the caramel will stick to the kernels without getting soggy.
Once the popcorn has cooled down, it’s time to prepare the caramel coating. You can do this by melting butter, brown sugar, and corn syrup in a saucepan over medium heat. Stir the mixture constantly until it reaches a smooth and bubbling consistency. This caramel mixture will be poured over the popcorn to create a deliciously sweet coating.
Tossing vs. Drizzling: Pros and Cons
When it comes to coating the popcorn with caramel, you have two options: tossing or drizzling. Each method has its pros and cons, so you can choose the one that works best for you.
Tossing the popcorn in the caramel mixture allows for a more even coating. This method ensures that every kernel is fully coated with caramel, resulting in a consistent and delicious snack. However, tossing can also lead to some caramel clumps, which may not be evenly distributed throughout the popcorn.
On the other hand, drizzling the caramel over the popcorn can create a more visually appealing and artistic coating. This method allows you to control the amount of caramel on each kernel, resulting in a customizable treat. However, drizzling may not guarantee an even distribution of the caramel, and some kernels may end up with less coating than others.
Preventing Clumping with Proper Mixing
One common issue when coating popcorn with caramel is clumping. Clumps of caramel can create uneven distribution and affect the overall taste and texture of the caramel corn. To prevent clumping, proper mixing techniques are crucial.
After pouring the caramel mixture over the popcorn, use a large spoon or spatula to gently toss the popcorn. This will help distribute the caramel evenly and minimize clumping. It’s important to avoid vigorous stirring, as it can break the popcorn into smaller pieces and create uneven distribution of the caramel coating.
In addition to tossing, you can also gently shake the baking pan or container to further distribute the caramel. This will help ensure that every kernel is coated and reduces the chances of clumping.
Strategies for Achieving an Even Layer of Caramel
If you want to take your caramel corn to the next level, you can use some strategies to achieve an even layer of caramel. This will result in a uniform and professional-looking treat.
One strategy is to spread the coated popcorn evenly on a baking sheet lined with parchment paper. This allows for better air circulation and prevents clumps from forming. You can also use a spatula or the back of a spoon to gently press down on the popcorn, ensuring that each kernel has a thin and even layer of caramel.
Another strategy is to bake the caramel-coated popcorn in the oven for a short period of time. This helps the caramel to set and creates a crispier texture. However, be careful not to overbake the popcorn, as it can lead to burnt caramel and a less enjoyable treat.
With these techniques and strategies, you can ensure that every kernel of your caramel corn is evenly coated with delicious caramel. Whether you choose to toss or drizzle the caramel, proper mixing and spreading techniques will result in a mouthwatering snack for any sweet treat lover.
Baking and Storing Caramel Corn
When it comes to creating irresistibly crunchy and long-lasting caramel corn, the final steps of baking and storing are crucial. By following the right techniques, you can ensure that your caramel corn stays fresh, maintains its crunchiness, and delights your taste buds for days to come.
The Perfect Oven Temperature and Time
The first key step to achieving delicious caramel corn is to bake it at the perfect oven temperature and for the right amount of time. Preheat your oven to 250°F (120°C) and line a baking sheet with parchment paper.
Pro tip: Set a timer to precisely track the baking time.
In a large saucepan, melt butter and brown sugar over medium heat, stirring constantly until the mixture reaches a smooth consistency. Once the caramel mixture is ready, pour it over the popped corn, making sure to coat each kernel evenly.
Fun fact: Did you know that caramel corn is a popular treat at carnivals and fairs?
Spread the coated popcorn onto the prepared baking sheet, ensuring an even layer. Place the sheet in the preheated oven and bake for 45 minutes, stirring the popcorn every 15 minutes. This will ensure that the caramel coating is evenly distributed and that all the popcorn is properly baked.
Expert tip: Keep a close eye on your caramel corn in the oven to prevent it from burning.
Cooling and Breaking Apart for Individual Pieces
After baking, it’s essential to let the caramel corn cool completely before breaking it into individual pieces. This will allow the caramel to set and harden, giving your popcorn that classic crunch.
Helpful hint: Place the baking sheet on a wire rack to speed up the cooling process.
Once the caramel corn has cooled, use your hands or a wooden spoon to gently break it apart into individual pieces. Be careful not to crush the kernels too much, as you want to maintain that perfect balance between crunchy and chewy.
Interesting fact: Caramel corn is a variation of the popular snack called kettle corn.
Storage Tips to Maintain Freshness
To ensure that your caramel corn stays fresh and tasty for as long as possible, proper storage is essential. Once the caramel corn has cooled completely and broken into individual pieces, transfer it to an airtight container. This will help prevent moisture from seeping in and making the popcorn soft.
️ Temperature tip: Store your caramel corn at room temperature in a cool and dry place.
If you’d like to prolong the freshness of your caramel corn even further, you can store it in the refrigerator. However, be aware that refrigeration can cause the popcorn to lose some of its crunchiness.
❄️ Storage hack: Freeze your caramel corn in an airtight container for long-term storage, and thaw it before enjoying.
By following these baking and storage tips, you can enjoy your homemade caramel corn for days, savoring every crunchy and sweet bite. Share it with friends and family or keep it all to yourself – the choice is yours!
Frequently Asked Questions
Thank you for taking the time to read our article on caramel corn recipe! If you have any further questions or need clarification on any of the steps, feel free to check out the FAQs below:
| No. | Questions | Answers |
|---|---|---|
| 1. | Can I use microwave popcorn instead of popping corn kernels? | Yes, you can use microwave popcorn. However, make sure it is plain and unsalted. Adjust the amount of caramel sauce accordingly. |
| 2. | Can I store caramel corn? | Yes, you can store caramel corn in an airtight container for up to a week. Just make sure it is completely cooled before storing to maintain its crunchiness. |
| 3. | Can I add nuts or other toppings to the caramel corn? | Absolutely! Feel free to customize your caramel corn by adding nuts, such as peanuts or cashews, or other toppings like chocolate chips or shredded coconut. Get creative! |
| 4. | Is caramel corn suitable for those with nut allergies? | No, caramel corn may not be suitable for those with nut allergies if you choose to use nuts as an additional topping. However, you can still enjoy it without nuts. |
| 5. | Can I double the recipe? | Yes, you can double the recipe if you need to make a larger batch. Just make sure you have a big enough pot to accommodate the increased quantity. |
| 6. | Can I make caramel corn without corn syrup? | Yes, you can make caramel corn without corn syrup. You can substitute it with honey or maple syrup for a slightly different flavor. |
Thank You for Reading!
We hope you enjoyed learning how to make your very own caramel corn. The combination of crispy popcorn and sweet caramel sauce is truly irresistible. Whether it’s for movie nights, parties, or just a snack, this caramel corn recipe is sure to be a hit. Don’t forget to save this recipe and visit again later for more delicious treats and incredible recipes. Happy snacking!
Jump to Recipe
Caramel Corn Recipe

Learn how to make homemade caramel corn with this easy and delicious recipe. Perfect for movie nights, parties, or a sweet snack!
- 8 cups popped corn kernels
- 1 cup granulated sugar
- 1/4 cup light corn syrup
- 1/4 cup unsalted butter
- 1/2 teaspoon salt
- 1/2 teaspoon vanilla extract
- 1/4 teaspoon baking soda
- Preheat your oven to 250°F (120°C). Place the popped corn kernels in a large mixing bowl and set aside.
- In a medium-sized saucepan, combine the granulated sugar, light corn syrup, unsalted butter, and salt. Cook over medium heat, stirring constantly, until the mixture comes to a boil. Continue cooking and stirring for an additional 3 minutes.
- Remove the caramel sauce from heat and stir in the vanilla extract and baking soda. The mixture will foam up, so be careful.
- Pour the caramel sauce over the popped corn kernels. Use a spatula or wooden spoon to gently toss and coat the popcorn with the caramel sauce until evenly distributed.
- Spread the coated popcorn evenly onto a large baking sheet lined with parchment paper or a silicone mat. Bake for 1 hour, stirring every 15 minutes to ensure even baking.
- Remove the caramel corn from the oven and let it cool completely on the baking sheet. Once cooled, break it into smaller pieces and serve. Enjoy your homemade caramel corn!


