If you’re a chocolate lover, then you’re in for a treat! ✨In this article, we will guide you through some mouthwatering and visually stunning Chocolate Fudge Cake decoration ideas that are guaranteed to impress your friends and family. Whether you’re preparing for a special occasion or simply indulging in a sweet craving, these cake decoration ideas will take your dessert to the next level. From elegant and sophisticated designs to playful and whimsical creations, there’s something here for everyone. So grab your apron, dust off your baking skills, and get ready to create a masterpiece that not only tastes divine but looks absolutely stunning too!
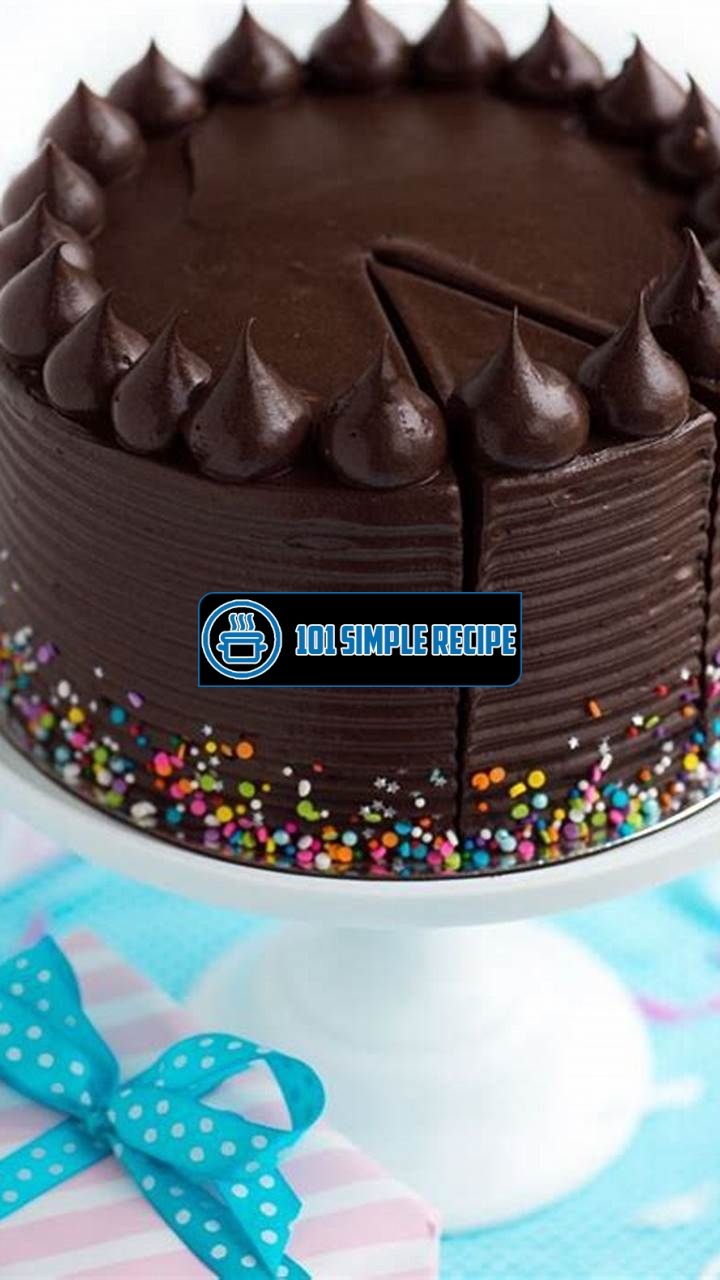
Understanding Chocolate Fudge Cake Decoration
Discover the art of decorating a chocolate fudge cake to create a visually stunning and delicious dessert.
The Significance of Cake Decoration
Cake decoration plays a vital role in making any dessert stand out. It not only enhances the visual appeal but also adds personality and creativity to the cake. When it comes to chocolate fudge cake decoration, the possibilities are endless. From simple designs to intricate patterns, you can let your imagination run wild and create a cake that will leave everyone in awe.
Decorating a chocolate fudge cake is like turning a blank canvas into a work of art. It allows you to express your creativity and showcase your skills. Whether you are a professional baker or a home cook, learning the art of cake decoration can take your desserts to the next level.
Important point: Cake decoration not only enhances the visual appeal but also adds personality and creativity to the dessert.
The Essential Tools for Chocolate Fudge Cake Decoration
To create stunning chocolate fudge cake decorations, you’ll need a few essential tools. These tools will help you achieve precise and intricate designs, making your cake look professional and enticing.
The first tool you’ll need is a palette knife or an offset spatula. This tool allows you to spread and smooth the frosting on the cake. It helps in creating a clean and even surface for your decorations. A good quality piping bag and a set of piping tips are also essential. These will enable you to pipe decorative elements like borders, flowers, and lettering onto your cake.
Other tools that come in handy for chocolate fudge cake decoration include a turntable, an icing smoother, and a cake comb. The turntable allows you to rotate the cake easily while you work on it, ensuring even coverage and smooth finishes. An icing smoother helps in achieving a polished look by smoothing out any imperfections on the frosting. A cake comb, on the other hand, creates textured patterns on the sides of the cake, adding depth and visual interest.
️ Important point: Essential tools for chocolate fudge cake decoration include a palette knife, piping bag, piping tips, turntable, icing smoother, and cake comb.
Tips for Preparing the Cake for Decoration
Before you start decorating your chocolate fudge cake, it’s essential to prepare it properly to ensure the best results. Here are a few tips to follow:
- Ensure that your cake is completely cooled before you begin decorating. Decorating a warm cake can cause the frosting to melt and ruin your design.
- Level the cake layers to create an even surface. This will make it easier to stack the layers and prevent the cake from leaning or toppling over.
- Apply a crumb coat to the cake. A crumb coat is a thin layer of frosting that traps any loose crumbs and provides a smooth base for the final layer of frosting.
- Chill the cake after applying the crumb coat. This will help the frosting set and make it easier to apply the final layer without disturbing the crumbs.
- Choose the right frosting consistency. For intricate designs, a stiff frosting works best, while for smooth finishes, a softer frosting is preferable.
Note: Properly preparing the cake by cooling it, leveling the layers, applying a crumb coat, chilling it, and choosing the correct frosting consistency is essential for successful cake decoration.
By understanding the art of chocolate fudge cake decoration and having the right tools and techniques at your disposal, you can create stunning and delectable desserts that will impress both visually and taste-wise.
Choosing the Perfect Frosting
When it comes to decorating a chocolate fudge cake, choosing the perfect frosting is essential. Not only does the right frosting enhance the taste of the cake, but it also adds to its overall appearance. There are various frosting options available to suit different preferences and requirements. In this article, we will explore three popular frosting options that will take your chocolate fudge cake to the next level.
1. Classic Buttercream Frosting
Buttercream frosting is a classic choice for any cake, and it pairs perfectly with a rich chocolate fudge cake. Its smooth, creamy texture and sweet flavor make it a favorite among both children and adults. To make buttercream frosting, you will need butter, powdered sugar, vanilla extract, and a bit of milk. Beat the butter until it becomes light and fluffy, gradually adding the powdered sugar and vanilla extract. Add a splash of milk to achieve your desired consistency. Spread the buttercream frosting generously over your chocolate fudge cake using a spatula or piping bag, and you’re good to go!
2. Rich and Creamy Ganache
Ganache is a decadent chocolate mixture that not only adds richness to your cake but also gives it a glossy, professional finish. To make a ganache, you will need chocolate and heavy cream. Heat the cream in a saucepan until it starts to simmer, then pour it over the chopped chocolate. Stir until the chocolate melts completely and the mixture is smooth. Let it cool slightly before pouring it over your cake. You can also use ganache as a filling between cake layers or pipe it onto the cake for intricate designs. The possibilities are endless with this indulgent frosting!
3. Whipped Cream Frosting for a Lighter Touch
If you prefer a lighter and fluffier frosting option, whipped cream frosting is the way to go. Made with heavy cream, sugar, and vanilla extract, this frosting provides a refreshing contrast to the rich chocolate fudge cake. Start by whipping the cream until it forms soft peaks, then gradually add the sugar and vanilla extract. Continue beating until the mixture thickens and holds its shape. Spread the whipped cream frosting over your cake and refrigerate it for a short while to help it set. This frosting option is especially popular during warmer months or for those who prefer a less sweet option.
Now that you have explored these frosting options, it’s time to unleash your creativity and decorate your chocolate fudge cake. Whether you choose the classic buttercream, rich ganache, or lighter whipped cream frosting, your cake is bound to be a showstopper. Remember to have fun while decorating and don’t be afraid to experiment with different techniques and designs. Happy baking!
Mastering Piping Techniques
Learn how to create intricate designs with different piping techniques to add flair to your chocolate fudge cake.
Using a Piping Bag and Tips
To create stunning designs on your chocolate fudge cake, mastering the technique of using a piping bag and tips is essential. This allows you to control the flow of frosting and create intricate patterns and designs.
Start by selecting the right piping bag and tip for your desired design. There are various types of piping bags available, such as disposable plastic bags or reusable cloth bags. Additionally, there is a wide range of tips available in different shapes and sizes.
Once you have your piping bag and tip ready, fill the bag with your desired frosting. Twist the top of the bag to push the frosting down towards the tip, removing any air bubbles in the process.
Hold the piping bag with a firm grip and apply gentle pressure to the top, guiding the frosting through the tip. Practice your designs on a separate surface before moving on to your cake.
When piping on your chocolate fudge cake, start from the outer edges and work your way towards the center. This helps create symmetrical designs and prevents any accidental smudging.
Remember to keep a steady hand and apply consistent pressure to ensure a smooth flow of frosting. Take breaks to rest your hand if needed, as this will help maintain control over your designs.
Create Beautiful Borders and Edging
Adding borders and edging to your chocolate fudge cake can elevate its visual appeal. It creates a defined look and frames the cake beautifully.
To create borders, use a round tip and pipe a continuous line along the outer edges of your cake. You can experiment with different sizes and patterns to find the perfect border for your cake.
For edging, consider using a star tip to create a decorative border around the top edges of your cake. This adds texture and visual interest to the overall design.
Don’t be afraid to get creative with your borders and edging. Use different colors of frosting, add sprinkles or edible pearls, or even incorporate small fondant decorations to make your cake truly unique.
Writing and Lettering with Royal Icing
Royal icing is a versatile frosting that can be used to write messages, add lettering, or create intricate designs on your chocolate fudge cake.
To use royal icing for writing and lettering, start by preparing a small batch of icing with a thick consistency. This will ensure that the letters hold their shape and don’t spread or smudge.
Transfer the royal icing into a piping bag fitted with a small round tip. Practice your lettering on a separate surface before moving on to your cake.
When writing on your cake, apply even pressure to the piping bag, squeezing out the icing in a controlled manner. Take your time and be careful to form each letter neatly.
If you’re not confident in your freehand lettering skills, you can use stencils or templates to guide your writing. Simply place the stencil on top of your cake and pipe the icing over it, following the outline.
Remember to let the royal icing fully dry before adding any additional decorations or serving the cake. This will ensure that your lettering stays in place and doesn’t smear.
In conclusion, mastering piping techniques is key to creating stunning chocolate fudge cake decorations. By practicing with a piping bag and tips, creating beautiful borders and edging, and using royal icing for writing and lettering, you can take your cake decorating skills to the next level. Get creative and have fun experimenting with different designs to make your chocolate fudge cake a true centerpiece!
Incorporating Decorative Elements
When it comes to decorating your chocolate fudge cake, there are numerous decorative elements that can be incorporated to elevate its appearance and make it even more delicious. Let’s explore some of these elements and learn how to incorporate them into your cake design.
Edible Flowers and Garnishes
One way to add a touch of elegance and beauty to your chocolate fudge cake is by using edible flowers and garnishes. These delightful floral decorations not only enhance the visual appeal of your cake but also provide a unique flavor experience. You can choose from a wide range of edible flowers such as pansies, roses, violets, and lavender, which not only look stunning but also taste amazing.
Tip: Try adding a few fresh mint leaves or a sprinkle of edible gold dust to make your cake even more eye-catching!
Adding Texture with Fondant
If you want to add a smooth and polished look to your chocolate fudge cake, fondant is the perfect option. Fondant is a pliable icing that can be rolled out and draped over your cake to create a flawless finish. It allows you to achieve a professional look without much effort. You can further enhance the texture by using embossing mats or stencils to create intricate patterns on the fondant.
Tip: Use contrasting colors of fondant to create visually appealing designs and patterns on your cake.
Utilizing Chocolate Decorations
When it comes to chocolate fudge cake decoration, chocolate itself can be a star element. You can use chocolate decorations to add an elegant and delicious touch. You can create chocolate curls, shavings, or even melt chocolate and pour it over your cake in artistic patterns. For a more sophisticated look, consider tempering the chocolate before using it for decoration.
Tip: Experiment with different types of chocolate such as dark, milk, and white to create contrasting effects on your cake.
By incorporating these decorative elements into your chocolate fudge cake design, you can transform it into a work of art. Remember to let your creativity shine and experiment with different combinations to find your unique style. So go ahead, have fun decorating, and indulge in the heavenly taste of your beautifully adorned chocolate fudge cake!
Advanced Decoration Techniques
Take your chocolate fudge cake to the next level with advanced decoration techniques that will undoubtedly wow your guests. From sculpting with modeling chocolate to airbrushing for a professional finish and creating 3D effects with isomalt, these techniques will elevate your cake decorations to a whole new level of artistry and creativity.
Sculpting with Modeling Chocolate
Sculpting with modeling chocolate is an advanced decoration technique that allows you to create intricate and realistic designs on your chocolate fudge cake. Modeling chocolate is a combination of melted chocolate and corn syrup, which gives it the perfect pliability and firm texture needed for sculpting. Whether you want to create delicate flowers, adorable figurines, or intricate patterns, modeling chocolate will be your go-to medium.
This technique requires some practice and patience, but the results are truly remarkable. Start by kneading the modeling chocolate until it becomes soft and pliable. Then, shape it into the desired form using your hands or various sculpting tools. You can create texture by using tools such as toothpicks or the back of a spoon. Once you’re satisfied with your creation, carefully place it on your chocolate fudge cake, and voila! You’ll have an edible masterpiece that will impress your guests.
Airbrushing for a Professional Finish
Airbrushing is an advanced decoration technique that adds a professional and flawless finish to your chocolate fudge cake. It involves using an airbrush gun to spray a fine mist of food coloring onto the cake’s surface, creating a smooth and seamless appearance. With airbrushing, you can achieve stunning gradients, intricate patterns, and even realistic images.
To get started, you’ll need an airbrush gun and food coloring in the desired shades. Dilute the food coloring with a bit of water or alcohol to achieve the right consistency for spraying. Begin by practicing on a piece of parchment paper or a test cake to familiarize yourself with the airbrush gun and the pressure needed for different effects.
Once you’re ready, carefully spray the colors onto your chocolate fudge cake, layer by layer, building up the desired design. You can create depth and dimension by layering different shades and blending them together. The result will be a cake that looks like it came straight from a professional bakery.
Creating 3D Effects with Isomalt
If you want to take your chocolate fudge cake decorations to a whole new dimension, then working with isomalt is the way to go. Isomalt is a type of sugar substitute that can be melted and molded into various shapes and designs. It has a beautiful, glass-like appearance and can be used to create stunning 3D effects on your cake.
To work with isomalt, you’ll need isomalt crystals, a silicone mold, and a heat source. Carefully melt the isomalt crystals on low heat until they become a clear liquid. Be cautious while working with isomalt, as it can reach high temperatures and cause burns. Once the isomalt is melted, carefully pour it into the silicone mold and let it cool and solidify.
Once the isomalt has hardened, carefully remove it from the mold and place it on your chocolate fudge cake. You can create various shapes, such as shards, flowers, or even intricate geometric patterns. The transparent and shiny appearance of isomalt will add a touch of sophistication to your cake.
With these advanced decoration techniques at your disposal, you can transform your chocolate fudge cake into a stunning work of edible art. Whether you choose to sculpt with modeling chocolate, airbrush for a professional finish, or create 3D effects with isomalt, your guests will be amazed by your creativity and skill. So go ahead, unleash your imagination, and take your cake decorations to the next level.
Thank you for reading our article on chocolate fudge cake decoration. We hope you found it informative and inspiring for your next baking adventure. If you’re craving more delicious recipes and cake decorating ideas, be sure to visit our website again later. Don’t miss out on the latest tips and tricks for creating beautiful and tasty cakes. Until next time, happy baking and enjoy your chocolate fudge cake!
Frequently Asked Questions
Here are some common questions about chocolate fudge cake decoration:
| No. | Questions | Answers |
|---|---|---|
| 1. | What are some ideas for chocolate fudge cake decorations? | Some popular decoration ideas include using chocolate ganache, sprinkles, fresh berries, and edible flowers. Get creative and let your imagination run wild! |
| 2. | How do I make a chocolate ganache for cake decoration? | To make chocolate ganache, simply heat heavy cream until it’s steaming and then pour it over chopped chocolate. Let it sit for a few minutes, then whisk until smooth. You can then pour or spread the ganache over your cake. |
| 3. | Can I use fondant for chocolate fudge cake decoration? | Yes, you can use fondant to create intricate designs and shapes on your chocolate fudge cake. Roll it out and cut it into desired shapes, then place it on your cake and smooth it down gently. |
| 4. | How do I prevent my chocolate fudge cake from sticking to the pan? | To prevent sticking, grease and flour your cake pans before pouring in the batter. Alternatively, you can line the bottoms with parchment paper for easy removal. |
| 5. | What are some alternative decorations for chocolate fudge cake? | If you’re not a fan of chocolate ganache or fondant, you can try dusting your cake with powdered sugar, using whipped cream and fresh fruit, or even creating a cream cheese frosting. |
| 6. | Can I freeze a decorated chocolate fudge cake? | Yes, you can freeze a decorated chocolate fudge cake. Just make sure to wrap it tightly with plastic wrap or place it in an airtight container before freezing. Thaw it in the refrigerator when you’re ready to enjoy it. |
Closing Thoughts
We hope this article has inspired you to get creative with your chocolate fudge cake decorations. Whether you choose to use chocolate ganache, fondant, or other delightful toppings, the possibilities are endless. Remember to have fun and enjoy the process of decorating your cake. We’ll be back with more delicious recipes and enticing cake decoration ideas, so stay tuned and visit our website again soon. Happy baking!
Jump to Recipe
Chocolate Fudge Cake Decoration

Learn how to beautifully decorate a chocolate fudge cake with delicious toppings and creative techniques.
- 2 cups all-purpose flour
- 1 3/4 cups granulated sugar
- 3/4 cup unsweetened cocoa powder
- 1 1/2 teaspoons baking powder
- 1 1/2 teaspoons baking soda
- 1 teaspoon salt
- 2 large eggs
- 1 cup milk
- 1/2 cup vegetable oil
- 2 teaspoons vanilla extract
- 1 cup boiling water
- Chocolate ganache (sprinkles, fresh berries, edible flowers, etc. for decoration)
- Preheat your oven to 350°F (175°C) and grease and flour two 9-inch round cake pans.
- In a large mixing bowl, whisk together the flour, sugar, cocoa powder, baking powder, baking soda, and salt.
- Add the eggs, milk, oil, and vanilla extract to the dry ingredients. Beat on medium speed for 2 minutes.
- Gradually add the boiling water to the batter while mixing on low speed. The batter will be thin.
- Pour the batter evenly into the prepared cake pans. Bake for 30 to 35 minutes, or until a toothpick inserted into the center comes out clean.
- Remove the cakes from the oven and let them cool in the pans for 10 minutes. Then transfer them to a wire rack to cool completely.
- Once the cakes are completely cooled, you can start decorating! Use your preferred method of decoration, such as spreading chocolate ganache, adding sprinkles, arranging fresh berries, or placing edible flowers on the cake.
- Slice the cake and serve it to impress your family and friends with your beautifully decorated chocolate fudge cake!

