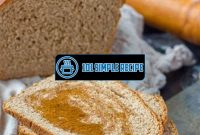
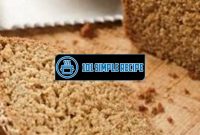
Are you craving a warm, fresh loaf of homemade brown bread? Look no further! Today, we will guide you through the steps to bake the best homemade brown bread . This timeless recipe is sure to become a staple in your kitchen, filling your home with the irresistible aroma of freshly baked bread. Whether you’re a seasoned baker or a beginner, this article will provide you with all the essential tips and techniques to create a loaf that is golden brown on the outside and moist and fluffy on the inside. So put on your apron and let’s get baking!

Understanding Brown Bread
Learn the basics of brown bread and why it has gained popularity among health-conscious individuals.
What is Brown Bread
Brown bread is a type of bread that is made using whole grain flour, which includes the bran, germ, and endosperm of the grain. Unlike white bread, which is made from refined flour, brown bread retains more of the grain’s natural nutrients and fiber. It has a slightly darker color and a denser texture compared to white bread.
- Brown bread is made using whole grain flour.
- It retains more nutrients and fiber compared to white bread.
- Brown bread has a darker color and denser texture.
Difference Between Brown Bread and White Bread
The main difference between brown bread and white bread lies in the type of flour used. White bread is made from refined flour, which is obtained by removing the bran and germ from the grain. This process also removes many of the nutrients and fiber found in the grain. On the other hand, brown bread is made from whole grain flour, which contains all parts of the grain. As a result, brown bread is considered to be more nutritious and healthier than white bread.
- White bread is made from refined flour, while brown bread is made from whole grain flour.
- White bread undergoes a refining process that removes many nutrients and fiber, whereas brown bread retains them.
- Brown bread is generally regarded as a healthier option compared to white bread.
Benefits of Brown Bread
There are several benefits to including brown bread in your diet:
- Rich in Fiber: Brown bread is an excellent source of dietary fiber. The fiber content in brown bread aids in digestion, helps regulate blood sugar levels, and prevents constipation.
- High in Nutrients: Unlike white bread, which is stripped of many nutrients during the refining process, brown bread retains a wide range of essential vitamins and minerals. These include B vitamins, iron, magnesium, and zinc.
- Weight Management: The fiber and complex carbohydrates present in brown bread can help you feel fuller for longer, which may assist in weight management and prevent overeating.
- Heart Health: Brown bread is low in saturated fat and cholesterol, making it a heart-healthy choice. It can help reduce the risk of heart disease and maintain healthy cholesterol levels.
Including brown bread in your diet can contribute to improved digestion, increased nutrient intake, better weight management, and a healthier heart.
With its nutritional benefits and delicious taste, brown bread has become a popular choice among individuals who are conscious of their health and wellbeing. By replacing white bread with brown bread in your meals, you can enjoy a more nutritious and wholesome eating experience.
If you’re looking for other delicious bread recipes, you might want to try this white bread recipe or this sourdough bread recipe. Both are simple and easy to follow.
Choosing the Right Ingredients
When it comes to baking a delicious and healthy loaf of brown bread, choosing the right ingredients is key. By selecting high-quality ingredients, you can ensure that your bread turns out perfectly every time. In this article, we will explore the essential components of a brown bread recipe to help you bake the best homemade loaf today.
Whole Wheat Flour
The first ingredient we’ll discuss is whole wheat flour. This type of flour is made by grinding whole wheat kernels, which contain the bran, germ, and endosperm. Unlike refined white flour, whole wheat flour retains many nutrients and fiber due to the inclusion of the bran and germ. Using whole wheat flour in your brown bread recipe not only adds a nutty flavor and a hearty texture, but it also boosts the nutritional value of your bread.
In addition to being a great source of fiber, whole wheat flour contains essential nutrients such as manganese, selenium, and magnesium. These nutrients contribute to a healthy diet and can help reduce the risk of certain diseases. To incorporate whole wheat flour into your brown bread recipe, simply replace a portion or all of the refined white flour with it. Experiment with different ratios to find the perfect balance of flavor and texture for your taste buds.
Natural Sweeteners
Another crucial ingredient in brown bread recipes is natural sweeteners. While white bread often contains refined sugar, brown bread can be sweetened with healthier alternatives that still provide a touch of sweetness. Natural sweeteners such as honey, maple syrup, or molasses not only add flavor but also offer some nutritional benefits.
Honey, for example, is rich in antioxidants and has antimicrobial properties. Maple syrup contains minerals like manganese and zinc. Molasses is a good source of iron and calcium. By using these natural sweeteners in your brown bread recipe, you can enjoy a burst of flavor while still maintaining a nutritious bread option. Adjust the quantity of sweetener according to your preference and create a perfectly balanced loaf.
Nutritional Additions
Incorporating nutritional additions into your brown bread can further enhance its taste and health benefits. Consider adding ingredients like nuts, seeds, and dried fruits to your recipe. These additions not only add a delightful crunch or chewiness but also provide essential nutrients such as healthy fats, protein, and vitamins.
You can experiment with various combinations of nutritional additions to customize your brown bread recipe. Try adding walnuts for their omega-3 fatty acids, flaxseeds for their fiber content, or raisins for a touch of natural sweetness. These additions not only enrich the flavor profile but also boost the nutritional value of your bread. Feel free to get creative and adapt the recipe to suit your taste and dietary preferences.
In conclusion, baking the best homemade loaf of brown bread starts with selecting the right ingredients. Whole wheat flour adds nutritional value and a hearty texture, while natural sweeteners provide healthier alternatives to refined sugar. Nutritional additions such as nuts, seeds, and dried fruits can further enhance the taste and nutritional profile of your bread. So, next time you reach for your apron, make sure you’ve got the perfect combination of ingredients for a delicious and healthy brown bread. Happy baking!
Preparing the Dough
When it comes to baking your own homemade brown bread, preparing the dough is an essential step. It sets the foundation for creating a delicious, hearty loaf that you can enjoy with your family and friends. In this section, we will walk you through the step-by-step process of preparing the dough for your brown bread. So roll up your sleeves, put on your apron, and let’s get started!
Combining the Ingredients
The first step in preparing the dough is combining all the necessary ingredients. To create the perfect brown bread, you’ll need flour, water, yeast, salt, sugar, and some oil or butter. Gather all these ingredients and measure them precisely to ensure the right balance of flavors.
Start by mixing the dry ingredients together in a large mixing bowl. This includes the flour, yeast, salt, and sugar. Stir them well using a whisk or a spoon to ensure even distribution. This will help activate the yeast and provide the bread with its distinct flavor.
Once the dry ingredients are mixed, create a well in the center of the bowl. Gradually add the water, along with the oil or melted butter. Slowly incorporate the wet ingredients into the dry mixture, stirring continuously. This will help create a smooth and elastic dough.
Kneading Techniques
Now it’s time to knead the dough. Kneading is a crucial step that helps develop the gluten strands in the dough, giving your bread its desired texture.
Transfer the dough onto a lightly floured surface and start kneading. Use the heels of your hands to push the dough away from you and then fold it back on itself. Continue this motion, adding more flour if necessary, until the dough becomes smooth and elastic. This process usually takes about 10-15 minutes. ⏰
Remember to be patient while kneading and avoid adding too much flour, as it can make the bread dense and dry. The dough should be slightly tacky but not sticky to the touch. Proper kneading will ensure a soft and fluffy brown bread.
The Importance of Resting Time
After kneading, it’s crucial to give the dough some resting time. This allows the gluten to relax and the yeast to ferment, resulting in a more flavorful bread.
Place the dough back into the mixing bowl and cover it with a clean kitchen towel or plastic wrap. Let it rest in a warm and draft-free area for about 1-2 hours. This gives the yeast enough time to work its magic and create air pockets within the dough, which will give your bread a light and airy texture. ✨
During the resting time, make sure to keep the dough away from cold drafts or direct sunlight, as extreme temperatures can affect the rising process. Patience is key here, so resist the temptation to rush through this step. Your patience will be rewarded with a perfectly risen brown bread!
Now that you have mastered the art of preparing the dough for your homemade brown bread, you’re ready to move on to the next steps in the bread-making process. So, put your newly acquired skills to use, and get ready to bake a delicious loaf of brown bread that will impress everyone at the table. Happy baking!
For those who are trying to lose weight, check out this weight loss recipe that can help you shed pounds while enjoying delicious food.
Baking Techniques
Mastering the art of baking brown bread is the key to achieving the perfect texture and flavor. By understanding the proper techniques and following a few simple steps, you can enjoy a freshly baked brown bread that will impress your family and friends.
Choosing the Right Temperature
One of the most crucial factors in baking brown bread is choosing the right temperature. This step can greatly affect the end result, as it determines how the bread will rise and develop its flavor. To ensure success, preheat your oven to 375°F (190°C).
By using the correct temperature, you allow the bread to cook evenly, creating a moist interior and a golden crust. It is also essential to place the bread in the center of the oven to avoid overcooking or undercooking it. This way, you will achieve a perfectly baked brown bread every time.
Understanding Baking Times
Another crucial aspect of baking brown bread is understanding baking times. The duration may vary depending on the size of the loaf and the oven’s accuracy. As a general rule of thumb, most brown bread recipes require baking for approximately 40-50 minutes.
However, to ensure the bread is fully baked, you can perform a simple test. Insert a toothpick into the center of the loaf; if it comes out clean, the bread is ready. If it comes out with moist crumbs, allow it to bake for an additional few minutes before testing again.
It’s important to note that each oven may have slight temperature variations, so it’s advisable to monitor your bread closely during the baking process to avoid over or undercooking.
Creating a Crispy Crust
One characteristic of a delicious brown bread is its crispy crust. Achieving this desired texture can be done by following a few techniques.
First, try brushing the top of the bread with melted butter or egg wash before placing it in the oven. This will help create a shiny and golden crust. Additionally, another technique is adding steam to the oven during the first few minutes of baking. This can be achieved by placing a pan of hot water in the bottom of the oven, creating steam that will aid in developing a crisp crust.
Furthermore, removing the loaf from the baking pan after it finishes cooking allows the sides and bottom to dry, resulting in a crispy exterior. Simply place the bread on a wire rack and let it cool completely before slicing.
In conclusion, mastering the art of baking brown bread involves understanding the importance of choosing the right temperature, monitoring baking times, and utilizing techniques to create a crispy crust. Following these guidelines will ensure that you achieve the perfect texture and flavor in your homemade brown bread. Enjoy!
If you’re planning a party, you might want to consider making this punch bowl recipe. It’s a crowd-pleaser and perfect for any occasion.
Storage and Serving Tips
When it comes to homemade brown bread, proper storage and serving techniques are essential to ensure its freshness and taste. By following the best practices, you can enjoy delicious brown bread for a longer period of time. Below, we will explore the proper storage methods, reheating and toasting techniques, and serving suggestions to help you make the most of your homemade brown bread.
Proper Storage Methods
Storing your homemade brown bread correctly is crucial in maintaining its quality. Here are some key tips to ensure your bread remains fresh and tasty:
- Keep it wrapped in a plastic bag: Wrap your brown bread in a plastic bag or place it in an airtight container. This creates a barrier that prevents air from reaching the bread and causing it to dry out.
- Store at room temperature: Brown bread is best stored at room temperature. Avoid direct exposure to sunlight or excessive heat, as it can lead to premature spoilage.
- Avoid refrigeration: Unlike some other types of bread, brown bread should not be refrigerated. The cold temperature can accelerate staling and make the bread lose its moisture. Keep it at room temperature for optimal freshness.
- Freezing for long-term storage: If you want to store your homemade brown bread for an extended period, freezing is the way to go. Wrap it tightly in plastic wrap and place it in a freezer bag. Ensure it is well-sealed to prevent freezer burn. When you’re ready to enjoy it, thaw the bread at room temperature or gently reheat it.
By following these proper storage methods, your homemade brown bread will stay fresh and delicious for longer periods.
Reheating and Toasting
There may come a time when you need to reheat or toast your brown bread to bring back its delightful warmth and taste. Here are some methods to achieve perfectly reheated or toasted brown bread:
- Reheating in the oven: Preheat your oven to 350°F (175°C). Wrap your brown bread in aluminum foil and place it in the oven for about 10 minutes or until it is heated through. This method helps retain the moisture in the bread.
- Toasting in a toaster or toaster oven: Slice your brown bread to your desired thickness and toast it in a toaster or toaster oven until it reaches your preferred level of crispiness. Keep an eye on it to prevent burning.
Note: Avoid reheating or toasting brown bread in a microwave as it can lead to a rubbery texture and uneven heating.
Serving Suggestions
Once you’ve properly stored and reheated your homemade brown bread, it’s time to serve it up in delectable ways. Here are some serving suggestions to elevate your brown bread experience:
- Slather on butter: Spread a generous amount of creamy butter over a warm slice of brown bread. The butter will melt, adding richness and enhancing the flavor.
- Pair with soups and stews: Brown bread complements hearty soups and stews exceptionally well. Serve a slice alongside a piping hot bowl of your favorite comfort food to soak up the flavors.
- Create mouthwatering sandwiches: Use your homemade brown bread as the foundation for delicious sandwiches. Fill it with fresh ingredients such as lettuce, tomatoes, cheese, and your choice of protein for a satisfying meal.
- Make breadcrumbs: If you have any leftover brown bread that has gone slightly stale, don’t throw it away! Transform it into breadcrumbs by simply pulsing it in a food processor. These breadcrumbs can be used as toppings for casseroles or added to meatball mixtures for added texture.
By trying out these serving suggestions, you can enjoy your homemade brown bread in various delectable ways, making each bite a delightful experience.
Remember, proper storage, reheating, and serving techniques are essential to maintain the freshness and taste of your homemade brown bread. Follow these tips and get ready to indulge in the amazing flavors of your own delicious creation.
Thank you for taking the time to read our delicious brown bread recipe! We hope you found it helpful and inspiring. If you’re craving more mouthwatering recipes and culinary tips, be sure to visit our website again later. Keep exploring the world of baking and trying out new recipes, because there’s always something new and exciting to discover in the kitchen!
Frequently Asked Questions
We understand that you may have some questions about our brown bread recipe. Here are some frequently asked questions to help clarify any doubts you may have:
| No. | Questions | Answers |
|---|---|---|
| 1 | Can I substitute whole wheat flour with all-purpose flour? | Yes, you can substitute whole wheat flour with all-purpose flour. However, the texture and flavor of the bread may differ slightly. |
| 2 | Can I use honey instead of molasses? | Yes, you can use honey as a substitute for molasses. It will add a slightly different flavor to the bread. |
| 3 | How long does the bread stay fresh? | The bread stays fresh for about 3-4 days when stored in an airtight container. |
| 4 | Can I add nuts or seeds to the recipe? | Absolutely! You can add your favorite nuts or seeds to the bread dough to give it some extra crunch and flavor. |
| 5 | Can I freeze the bread for later? | Yes, you can freeze the baked bread for up to 3 months. Just make sure to wrap it tightly in plastic wrap and place it in a freezer-safe bag or container. |
| 6 | Can I use a bread machine to make this recipe? | Yes, you can use a bread machine to mix and knead the dough. Follow the manufacturer’s instructions for the best results. |
Happy Baking and Enjoy!
We hope you have a wonderful time baking and enjoying your homemade brown bread. Don’t hesitate to experiment with different ingredients and flavors to make it your own. Remember, baking is not just about the end result, but also the joy and creativity that goes into the process. So roll up your sleeves, put on that apron, and get ready to create something delicious!
Jump to Recipe
Brown Bread Recipe

Learn how to make a delicious and healthy brown bread with this easy recipe. Perfect for breakfast or as a side for soups and stews.
- 2 cups whole wheat flour
- 1 cup all-purpose flour
- 1 1/2 teaspoons baking soda
- 1/2 teaspoon salt
- 1 1/4 cups buttermilk
- 1/4 cup molasses
- 2 tablespoons vegetable oil
- Preheat the oven to 350°F (175°C) and grease a 9×5-inch loaf pan.
- In a large bowl, whisk together the whole wheat flour, all-purpose flour, baking soda, and salt.
- In a separate bowl, mix together the buttermilk, molasses, and vegetable oil.
- Pour the wet ingredients into the dry ingredients and mix until just combined. Do not overmix.
- Pour the batter into the prepared loaf pan and smooth the top. Bake for 55-60 minutes, or until a toothpick inserted into the center comes out clean.
- Remove the bread from the oven and let it cool in the pan for 10 minutes. Then transfer it to a wire rack to cool completely before slicing and serving.


